Sunday, October 16, 2016

Simple paper flowers

Hi lovelies! I thought I would show you how I've been doing my simple paper flowers. I cut out a bunch of circles from my scrap pieces of coffee dyed, designer,  and music papers.  I used 3 sizes 3/4", 1", and 1 1/4".   
 
 
Next I wadded them all up into loose balls, then unfolded them.
 
 
Using vintage photo distress ink, I inked the circles
 
Then I chose 2 to 3 circles to glue together, making sure the larger circle was on bottom.


Then I put an adhesive backed gem in the center of each one.


See, super easy!!  I hope you enjoyed this little tutorial. Take care and happy crafting!

Monday, September 19, 2016

Lots of stuff going on. At the beginning of the month we took a family mini vacation camping. It was me, my husband, our 3 kids ages 12, 6, 1. My mother and father-in-law and their middle son, his wife, and their 5 kids, ages 12, 10, 8, 7, and 1. So two toddlers tied us mom's to hanging out in the cabins or around the river swimming.  The kids all had a blast so it was fun.  We started our homeschool year 2 days after we came back. That's been occupying a good amount of my time. After all I have to relearn 6th grade math, to be able to help my oldest, and I have to beg my 1st grader to read. She loves to be read to, but doesn't enjoy it yet herself.

I've been working on journals for etsy, and I was hoping to do a Gypsy Moon Glow Caravan show in the middle of October. It just looks so fun, but if I don't get hopping I won't have enough inventory!!


My hubby did get me some stuff to make some fall and Halloween journals with though. He's a great guy like that. Always wanting to do things to surprise me and stuff.


 I've also been cleaning up an old bookcase that was in my hubby's shop at work. He's a mechanic so it held some really grimy things, but it's in great shape, is solid wood and is about 4ft square and 10 inches deep. Lots of storage for my crafty stuff!


So this has been my month so far. Please share what you've been up to!!

Thursday, August 25, 2016

Hey lovelies! I'm so sorry I haven't posted in a while. I've been working on a lot of things. I'm down 55 pounds as of today! I've got a lot to go, but I'm getting there!!

I'm working on getting journals done for the October craft fair season. I've been invited to 2 on the same day. Not sure which, if either, that I'll choose.  I've bought a new set of stamps. I've sold one of the decoupage necklaces that I shared a mini tutorial for. I bought a lot of stickers from the Dollar Tree. They're beautiful, and look pretty vintage.

 
I have also started reading Harry Potter and the Cursed Child. I have started working on a journal for my bestie. I've been trying to catch up on housework before we start homeschool after we get back from vacation. I need to get all of my stuff together for vacation too.  There aren't enough hours in the day. LOL I am never bored though that's for sure.
 
Oh a friend of mine over at Junk Journal Junkies on Facebook has opened an Etsy Shop. https://www.etsy.com/shop/SoulSearchinJournals Go check it out. She just opened and already sold the first journal she posted. How awesome is that!  Anyway have a great week everyone! I'll post again soon. I want to show how I print on tissue paper and then decoupage it onto what ever I want. I may do a "printed" candle tutorial soon also.
Happy Crafting and take care everyone!

Wednesday, August 10, 2016

Keto Diet update.

Well it's been about 16 weeks, or 4 months, since I started the Keto way of eating. As of Monday, August, 8th, 2016, I've lost 51.5 lbs! I get frustrated some times because I'll see fluctuations of about a pound here and there, but I know it's water retention because I'm not keeping myself as hydrated as I should.  The point is, it's working. I feel great, and I'm getting healthier.
In September my family is going to go stay in some cabins with my In-Laws. There will be 14 of us in 3 cabins and tons of fun. Fishing, and swimming, grilling, games, etc. I can't wait. I have less than a month, and I would really like to hit 55 lbs lost by then. So keep me in your thoughts and prayers as I try to reach this goal.
I've been looking up some recipes for easily made foods while we're there, because let's be honest, no one wants to spend their entire vacation cooking! My Sister-In-Law and I will be doing the majority of the cooking. I plan on doing Keto waffles for me, her and my Mom-In-Law since we're all doing low carb. I will make and freeze some homemade waffles for the rest of the group. We'll also be doing spaghetti one night for dinner, so I'm thinking we'll have zoodles! I'm so excited. I haven't been "camping" since I was a teenager!!  I really hope my kids enjoy this. I've been wanting to take them camping for a long time but my hubby isn't a fan of camping in tents, so maybe this will change his mind some.
Well that's all I have for now. I have to get back to mommy duties, and getting my journals and jewelry done for the craft fairs this fall. Wish me luck!

Wednesday, August 3, 2016

Quick Mini Tutorial

I know I've been busy and haven't been posting much lately. I've had some back trouble, and had VBS last Saturday. That was an awesome time!

So I figure I should share something with you guys. I am trying to prep for Christmas afghans I'm working on for clients, and also get some inventory built up in my etsy shop and for my Fall Craft booth.  One of the things I'm working on is pendants.

I rolled out polymer clay about 1/8 of an inch thick and cut it into 1 1/2 inch squares, and baked per the package directions.

While those were baking I chose a collage page to use as my background. I chose to do some in black and white so I copied my vintage brown paper in the copy machine.


Then I chose my background and cut it out slightly bigger than my clay tile. I applied a liberal amount of white glue to the tile, pressed the image onto the tile and when dry I cut the excess paper from the tile. I also tried to decopage a rose onto it, but the black tiles were too dark. *duh, I know lol*
 
Next I took my finger and patted a bit of white paint over the background, and when it dried I glued on this lovely lady, also in black and white. Then when it was all dried I inked around the edges in black to match the tile.
 
I ended up putting a jewel on this one in the corner then sealing with Glossy mod podge, and then I went over that with an acrylic sealer to avoid the sticky feel. You could use Glossy Accents, or resin epoxy, or any number of gloss sealers.
You can do pretty much anything you want with these. Here's a shot of the few I've finished and sealed. I still have to put the bails on. I really like the way they have turned out. Oh, and yes, they are different sizes. Mostly because I used two different cutters, but these are hand made not assembly line and are supposed to original. That just adds to their charm. ;)
 
There you go. Easy polymer clay pendants. Happy Crafting Lovlies!
 

Tuesday, July 19, 2016

Envelope journal tutorial (kind of)

Hey lovelies! I've just gotten into making journals out of manila envelopes. This one is made from a 6 X 9 inch manila envelope.
 
There is a pocket in both the front and back covers.


To begin I lay out the envelope flat, and remove the clasp if it has one.

 
Next I make sure all of the overlapping places are securely closed. We will be matting over these places and do not want the extra lumps of a loose flap.  After that is done, trim a super thin sliver off of the bottom closed end of the envelope. This will be the pocket in the front cover of the journal. I'm sorry but I didn't take a picture of the gluing or trimming.
 
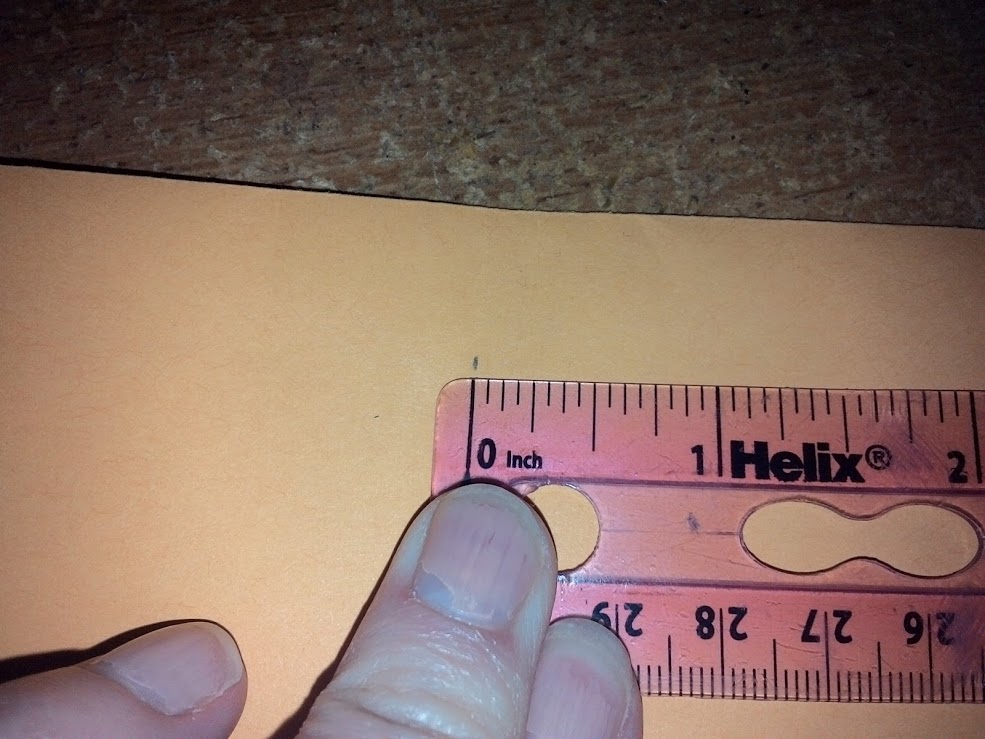
Next I measured 1/2 an inch from the flap fold and marked it lightly in pencil on the top and bottom.
 
In the picture I drew a line so you could see better where I was talking about. Then I make angular cuts to make folding the marked part of paper inside the envelope easier. I put the piece of paper in the cut, so you can see how I angled mine.
 
I then applied glue, white craft glue, to the inside of paper to be folded, and tucked it under.
Next snip off those little corner pieces sticking out.
 
Measure in again from the flap fold on both sides. This time only go in 1/4 inch, and fold. This will be your flap spine.
 
Next make your center spine. I folded the bottom edge (that we cut the sliver off of ) to the original fold line of the flap, and then measured going from that line, toward the flap,  1/4 inch. This will be your spine.


From here I just matted the front and back covers and sewed in my two, six page signatures and added a button closure and ribbon to wrap around it.
 
These can be as fancy or as plain as you want! Experiment and have fun! Happy Crafting!

Sunday, July 10, 2016

What if I can't afford punches?

Being a single income family is hard. Crafting on a limited budget doesn't mean you can't have all of the embellishments that you desire.  All it takes is some creativity and patience. What I've done is to go around the house and find objects similar in size to what I wanted. I found circles in many sizes, a raffle ticket, a baby food container lid (the plastic rectangle containers) a foam star that fell off of one of the projects the girls made at church, a journaling card that I was gifted, and a banner I made.
 
All I did was cut these out of Kraft cardstock. These will be great templates until I can afford all of the punches I want.
 
Crafting is supposed to be fun, so no need to stress over the things we don't have.  So go out there, and find a way to do what you love! Happy crafting lovelies!