This one was done on the same premise of finding paper in a Post-Apocalyptic situation and making it into a journal.

So I started off with a text block as before. I used this video from Jennifer at SeaLemon, https://www.youtube.com/watch?v=XGQ5P8QVHSg. You can check out my post on my Second Journal, if you want to see what the aged papers look like before they're sewn into the text block. I forgot to take before pictures. I'm still new to this whole record keeping business when it comes to how I made something.
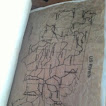
Here are some pictures of the inside of this book.


I didn't get good pictures of the cover. I used Heat 'n Bond to bond two pieces of paper bag together that I knew would generously cover my text block plus some. I sprayed my paper bag piece with glycerin water lightly all over, let it soak in, repeated on the back side, and once it could be scrunched up without sounding papery I scrunched up the whole piece and unfolded, then scrunched again, lather, rinse, repeat. I then measured out how big I wanted my cover pieces, a front, back and spine, on a paperboard box. I tried to leave a bit of overhang. I wanted more than I had with the last one. I then sponged some paint lightly over the surface of the side of the paper bag piece that I wanted to face out. After it was completely dried I used the Heat 'n Bond to bond the paper bag piece to the spine, and then spaced the front and back a quarter of an inch away from the spine and used Heat 'n Bond to adhere them to the paper bag piece. I folded over the edges, and used the Heat 'n Bond to adhere the folded edges onto the paperboard. I then covered the whole inside in aged paper with again, the Heat 'n Bond. (Can you tell that I'm in love with using Heat 'n Bond to help in the binding?) I used Elmer's Glue All to attach the cover pages of my text block to the inside of the cover.
The closure is simple. I used an awl to poke holes and sewed on an antiqued gold shank button, and another hole for the hemp twine. I put one end through the hole going inside to outside, triple knotted the twine on the end that would be inside the book. This can be wound around the book once and then around the button 4 or 5 times, or can be wound around the button several times.
That's it for this one! I hope it made sense. I hope you learned something, and I hope you have a great rest of the week!
No comments:
Post a Comment