Wednesday, March 30, 2016

DIY Planner on the CHEAP!

Hey folks! I have yet another great DIY, and this one involves another Composition Book. I LOVE these things! You can do so much with them. They're already bound and lined, all you have to do is put a cover on it that you love and Ta Da! Awesome Journal/Planner/Recipe book!

For this project I took an older Composition Book that I had laying around, cut out the pages that I had already used and then started from scratch.  I covered the front and back covers with pretty papers and double sided tape. I didn't want to wait for glue to dry, and I hate using glue sticks, because to me they aren't sticky enough, and they seem to dry out before I get the paper on whatever I'm putting it on.
 
 
Next I decided on my layout for the inside. I wanted to have a full month, two page layout for each month, and I put the 7 days of the week on a two page layout. I don't need a step by step at the moment I don't think. But if I do, I can always add in lists via extra paper whether it be sticky notes, a stapled list, or a paper clip to hold it on. Can't you tell I'm super organized? Ha ha!
 
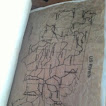
This is what my lay out looks like. I posted measurements on the pictures so that you can see how I made it. This is a wide ruled book, but all you have to do figure out how to divide it evenly.
For the monthly calendar, I measured from the margin(red) line over 6 inches, and divided that 6 inches into 1.5 inch sections. From there it's just a matter of drawing in your grid and labeling your days, and dates. Don't forget to label the month. I've just used pencil for the months. I may go in later and draw a design, I may not. Who knows. What you do with yours is what makes this great, it's totally up to you!  I left the column on the right page after Sunday blank for weekly notes, like to prep for something for next month, or ideas for my blogs etc, while leaving room on the date sections for birthdays and events.


With the daily sections, I divided each page into 3 sections by marking off under the 8th line. Then on the right hand page, I divided the bottom one into 2 for Saturday and Sunday. I wrote the names of the day in the left margin, and in the right corner of each section(day) I wrote the date and circled it so that it doesn't get lost in any writing I do.

Well here it is! All together this planner will cost less than two dollars, or can cost as much as you want to put in to it. I may add a dashboard later or a few pockets for receipts or something, but as of right now I don't fore see my need for them.  If you make one of these, please share or send me pictures. Let me see how you personalized yours!

Tuesday, March 22, 2016

Post-Apocalyptic Journal

Hey folks! Thanks so much for coming back!  I have yet another hand bound journal to share.
This one was done on the same premise of finding paper in a Post-Apocalyptic situation and making it into a journal.

So I started off with a text block as before. I used this video from Jennifer at SeaLemon, https://www.youtube.com/watch?v=XGQ5P8QVHSg.  You can check out my post on my Second Journal, if you want to see what the aged papers look like before they're sewn into the text block. I forgot to take before pictures. I'm still new to this whole record keeping business when it comes to how I made something.
Here are some pictures of the inside of this book.


Keep in mind, this is made to look like I (or someone) bound this journal from items or papers scavenged along the way.  For the map, I printed that on a paper lunch bag, and then wadded it up, then flattened it out. There are 4 pages of instructions from a vintage baby pattern.  I took a left over piece of the paper lunch bag, folded it to make pockets and sewed up the sides. There are a couple of little pages from a small novel,  a couple of pages with "shopping lists", a page from a ledger, a page with a coffee stained ring, a couple of envelopes, and a few sheets of graph paper. \

I didn't get good pictures of the cover.  I used Heat 'n Bond to bond two pieces of paper bag together that I knew would generously cover my text block plus some. I sprayed my paper bag piece with glycerin water lightly all over, let it soak in, repeated on the back side, and once it could be scrunched up without sounding papery I scrunched up the whole piece and unfolded, then scrunched again, lather, rinse, repeat.  I then measured out how big I wanted my cover pieces, a front, back and spine, on a paperboard box. I tried to leave a bit of overhang.  I wanted more than I had with the last one. I then sponged some paint lightly over the surface of the side of the paper bag piece that I wanted to face out. After it was completely dried I used the Heat 'n Bond to bond the paper bag piece to the spine, and then spaced the front and back a quarter of an inch away from the spine and used Heat 'n Bond to adhere them to the paper bag piece.  I folded over the edges, and used the Heat 'n Bond to  adhere the folded edges onto the paperboard.  I then covered the whole inside in aged paper with again, the Heat 'n Bond. (Can you tell that I'm in love with using Heat 'n Bond to help in the binding?)  I used Elmer's Glue All to attach the cover pages of my text block to the inside of the cover.
The closure is simple. I used an awl to poke holes and sewed on an antiqued gold shank button, and another hole for the hemp twine. I put one end through the hole going inside to outside, triple knotted the twine on the end that would be inside the book. This can be wound around the book once and then around the button 4 or 5 times, or can be wound around the button several times. 

That's it for this one! I hope it made sense. I hope you learned something, and I hope you have a great rest of the week!


Monday, March 14, 2016

Second Journal Continued

So I finished my journal, listed it on Etsy, and it was gone in less than an hour! So, since I've already prepped it for mailing, I guess I better post the pictures of how made the cover.

This is the finished product, but it started out like this, lots of crumpled up paper bag pieces.
I then deco paged the crumpled pieces onto a cereal box cut to the size I needed to fit over the paper. I made it purposely a close fit, and allowed a bit of over hang because this is a journal that is supposed to look like it was put together with scraps and pieces found over time.
 
After I covered the whole front of the box, I covered it with wax paper, then placed it under a weight (a case of diapers) and allowed it to dry over night. The next day, it looked like this.
I think folded the paper bag pieces over the edges of the cover, and deco paged over them, covered the back side in wax paper and allowed it to dry over night.
I dry brushed some brown acrylic paints in different shades, and then wiped them off with a dry paper towel.  After everything was dry I went over the edges of the spine and around the edge with a finger nail file just to rough it up a bit and make it look a bit faded. A final inspection of any bag pieces that might have lifted around the edge, and the cover was done. All I had to do was glue my text block to the cover and Tada!  Zombie Apocalypse Journal.


Friday, March 11, 2016

Update on the journal

So here's a little update on my second journal project. I will eventually get back to the first one, but I want to go to Hobby Lobby and get some embellishments, and the nearest Hobby Lobby isn't open for business yet, I have to wait until next month for that, or I have to go to a store farther away, much farther away.

Okay so I started out by aging 25 sheets of printer paper. The reason I used printer paper instead of a higher quality paper is because when aging you generally use liquid, and the paper swells.  Also I didn't want to have a lot of money involved in a project I wasn't sure would turn out. I don't have pictures of the aging process, but it's so simple. You can use tea, coffee, or balsamic vinegar to get that aged look. I used all three. Some sheets got drenched, some were lightly coated using a paper towel dipped in which ever liquid I wanted to use. I dried mine in the oven at 300 for a few minutes. About 3 I think. I did flip them over half way so they would dry evenly. You can use a blow dryer or even hang them on a line. Fair warning though, if you do age them by getting them saturated the pages will not be flat unless you iron them, even then I can't guarantee they will be as flat as before. I also noted some shrinkage on some of the pages after drying in the oven.  While aging some of the pages I decided to let my kids each have one and they drew their own treasure maps.

 
I then took a few and went around the edge with a lighter. I advise you to do this over your sink or a metal pan, and have some water on hand because I might have set one on fire and had to put it out with water.
 
After I distressed all of the pages to my liking, I folded them in half  as best as I could considering the pages were a bit wonky from their baths.  I then used this video tutorial to make a text block.
 
This is what my text block looks like finished.  Here are some pictures of the inside. I threw in some odd pieces of paper, and a couple of envelopes as tuck spots for event tickets and things one would like to keep.
I love this last picture with the whole burned through, it is one of my favorites. I wanted this journal to look as if it were put together with found papers, but if I wanted to give it to someone or sell it I couldn't really use papers with addresses and phone numbers. Maybe next time I make one of these I will print some pages with some false headers and  use some script stamps to liven things up a bit. This is only my third journal, and only my second case bound one.  (BTW, yes, I know my desk is quite a mess. I need to take the time to clean it off. )
So this is my journal's text block. I'm still working on the cover. I only get a few minutes each day to work, so the process is slow. I still have to put the finish on the faux leather and let it dry then seal it.
If you have any questions please feel free to post them. I'll do my best to answer. If you have any ideas, suggestions or whatever, please post away. I welcome the feed back.


Thursday, March 3, 2016

Too many ideas, not enough time!!

This weekend I plan on finishing up my altered composition notebook and sharing the pictures. While I don't have much time for crafting during the day with  little man crawling around and chasing the rabbit, and homeschooling the girls, I do have time to crumple paper. Tonight while I'm waiting on the hubster to get home, I'm crumpling up some paper grocery sacks. We try to use paper as often as possible, not only is it better for the environment, but we use them until they are quite literally falling apart, then I reuse them for something else.
This time I am using them to try to make a faux leather journal cover. I aged some papers and need to sew them into a text block. Then I want to make an aged faux leather cover to go with it. I have it all planned out in my head. How it will look when I get done, only time will tell. As of right now I'm wondering if I should just apply it straight to the book board, or should I back it with fabric or paper. Any input? If you've tried this please share with me how you did it. :)